So, your Xbox Series X is suddenly not showing any display on your TV? Frustrating, right? That moment you’re all set for gaming and—bam—no signal. If you’re wondering how to fix Xbox Series X HDMI port, you’re not alone. Many gamers run into this, especially after moving their console.
In this guide, we’re going to walk you through everything: the signs, the diagnosis, the fix, and how to prevent it in the future. Let’s roll!
You fire up your Xbox Series X, ready for some gaming, but the screen stays pitch black. No welcome sound, no error message—just silence , Black screen. That’s usually a telltale sign something’s wrong with the HDMI connection.
If you’ve been googling how to fix Xbox Series X HDMI port, The HDMI port plays a critical role in sending video signals to your TV, so if it’s not working, you won’t get any display at all..
Here’s what might be going wrong:
Loose HDMI Connection: The cable might not be fully seated, or it’s worn out. Try unplugging and firmly reconnecting it.
Damaged HDMI Port: Physical damage or bent pins inside the port can block signal transmission entirely.
Faulty Cable or TV Input: Sometimes, it’s the cable or the TV’s HDMI port at fault—test with a different cable or port.
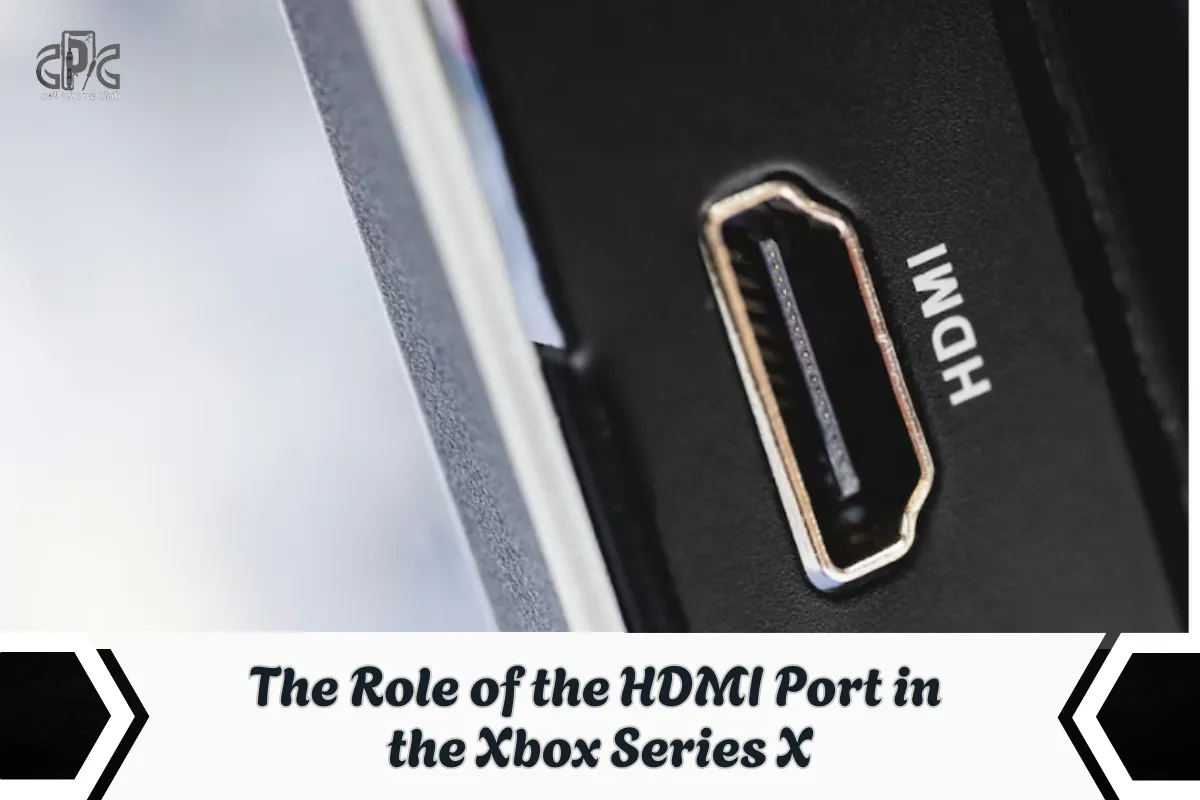
Imagine the HDMI port as the Xbox Series X’s lifeline to your TV. It’s how your console communicates and delivers that stunning gameplay experience to your screen. If the port is damaged, loose, or bent, this vital communication is interrupted. Even if the console itself is running smoothly, a faulty HDMI port means you won’t see any visuals.
Why it matters:
High-Resolution Output: The HDMI port is key to transmitting 4K and HDR signals, ensuring crisp, vibrant visuals.
Seamless Gameplay: It plays a role in preventing lag, flickering, and ensuring smooth transitions during intense gaming sessions.
Core Hardware: Without a working HDMI port, all the other powerful features of your Xbox Series X are rendered useless in terms of display.
You hit the power button, the console lights up—but your screen stays black. No welcome animation, no dashboard, nothing. So, what’s going on? This is one of the most frustrating issues Xbox Series X users face, and it usually boils down to one of three culprits:
Faulty or Loose HDMI Port: If the port is damaged or the connection isn’t snug, the signal simply won’t make it to your TV.
Damaged HDMI Cable: Internal fraying or broken pins in the cable can block the video signal entirely.
Signal Handshake Issue: Sometimes, the console and TV fail to “handshake,” meaning they don’t establish a proper video connection.
But if you’ve tried changing cables and ports and it’s still not working, then yeah—it’s probably time to explore Xbox Series X HDMI port replacement.

When the screen goes black, most gamers immediately suspect the usual culprits—either a bad HDMI cable or a random glitch in the TV settings. Sounds logical, right? But here’s the twist: in about 8 out of 10 cases, the real issue is hiding in plain sight—the HDMI port itself.
Let’s break down the common (but often wrong) assumptions:
“It’s the cable.” Sure, cables wear out, but they’re rarely the root of persistent no-signal issues.
“My TV’s acting up.” TVs can misbehave, but a faulty port mimics those symptoms exactly.
“My Xbox is dead.” Nope! Most of the time, the console is powering on perfectly—it just can’t talk to your screen.
Absolutely! The good news? Yes, a broken HDMI port on Xbox Series X can be fixed. The bad news? It’s not a plug-and-play job. This repair involves opening the console, safely removing the damaged port, and replacing it with a new one.
Whether you’re doing a full Xbox Series X HDMI port replacement or just reconnecting loose pins, it requires precision tools and a steady hand. Unless you’re comfortable with electronics repair, it’s best left to a pro.
Here’s what’s involved:
Opening the Console: Carefully take apart the casing without damaging internal components.
Removing the Faulty Port: This often means desoldering the old HDMI port from the motherboard.
Installing a New One: The new port needs to be aligned and soldered into place precisely.
If you’re not confident working with hardware, it’s a good idea to let a professional handle it. Still, it helps to understand how to fix Xbox Series X HDMI port problems so you know what to expect.
Read Also: How to replace HDMI port on PS4 — The complete repair guide 2026
When your screen suddenly goes black, it’s easy to panic—but figuring out the root cause doesn’t have to be a guessing game. Diagnosing the HDMI problem on your Xbox Series X is all about narrowing it down step by step until you know exactly what’s wrong.
Here’s the full process we follow to get clarity:
Swap the HDMI Cable: Always start with the basics. Use a known working HDMI cable from another device. If there’s still no signal, you can confidently move on.
Test a Different TV Input Port: Sometimes the problem isn’t with the Xbox at all. Plug the HDMI cable into another port on the TV—or better yet, a different TV entirely—to rule out a bad input.
Try a Different HDMI Device on the Same TV Port: Plug in another console, Blu-ray player, or laptop using HDMI. If it works, that suggests the TV port is fine and the issue lies with the Xbox.
Activate Low-Resolution Mode: If the console powers on but no display appears, try pressing and holding the Eject + Power buttons together. This boots the Xbox in low-resolution mode, which can reveal resolution-related issues that might prevent standard display.
Inspect the HDMI Port Physically: Use a flashlight or magnifier to check inside the HDMI port. Look for bent pins, debris, burn marks, or wobbliness. If the port feels loose or looks misaligned, there’s a high chance it’s physically damaged.
Feel for Firmness When Plugging in the Cable: When inserting the HDMI cable, there should be a slight resistance or ‘click’ feel. If it slides in too easily or wiggles around, the port may be worn or detached internally.
Check for Audio Feedback: If the Xbox is on and you hear sounds (like menu clicks or startup tones) but see no visuals, it’s likely a video output issue—another sign pointing toward the HDMI port.
At that point, we know we’re dealing with a hardware issue—and that’s when it’s time to look into how to fix Xbox Series X HDMI port problems the right way.
The following is a Video for Our Game Console Technician while repairing Xbox Series X HDMI Port
Read Also: PS5 Beeps Once But Won’t Turn On? Here’s What You Should Know
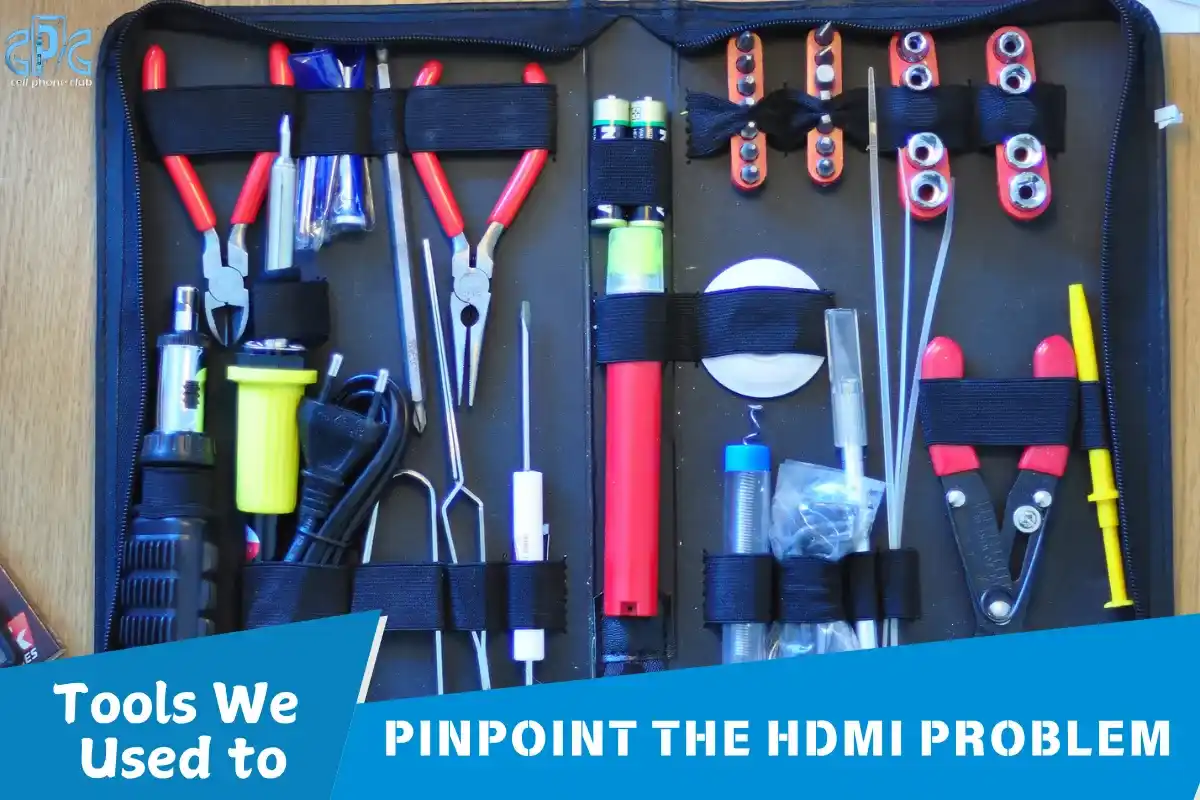
You don’t need a full tech lab to figure out what’s wrong with your HDMI port—but having the right tools can make the job a lot easier. When you’re unsure where the issue lies, these simple tools can help you get a closer look without guessing.
Here’s what we used:
Flashlight and Magnifier: Perfect for spotting bent or misaligned pins inside the port.
Multimeter: Helps check voltage and continuity to see if the port is still functioning electrically.
USB Borescope: This tiny camera gives a detailed close-up view of the port’s internal condition.
Fine-Tip Tweezers or Plastic Probes: Useful for gently straightening pins or removing debris without causing more damage.
Replacement HDMI Port (Specific to Xbox Series X): In case the port is beyond repair, having a compatible replacement speeds up the fix.
These tools make it easier to identify whether you need to fix the broken HDMI port on Xbox or if it’s just a cleaning issue.
Most of the time, the damage becomes clear after a careful visual check. It’s not always dramatic, but the signs are there—you just have to know what to look for. Whether it’s something subtle or a total disconnect, spotting the issue early is key.
Here’s what usually gives it away:
Sinking Side: One side of the HDMI port looks pushed in or uneven—often caused by cable stress or impact.
Bent Pins: Misaligned or twisted pins inside the port disrupt signal flow and can’t be fixed without precision tools.
Burn Marks: Signs of internal shorts may appear as tiny black spots or discoloration inside the port.
Loose or Detached Port: In extreme cases, the HDMI port separates from the motherboard—this is a clear sign of serious hardware failure.
Once these symptoms show up, there’s no guesswork needed. At that point, knowing how to fix Xbox Series X HDMI port issues means preparing for a full replacement.
You’d think something as critical as an HDMI port would be built tough—but on the Xbox Series X, they’re surprisingly delicate. Everyday habits can easily lead to damage, especially if you’re not aware of how vulnerable the port really is.
Here are the most common ways HDMI ports take a hit:
Moving the Console with Cables Plugged In: This puts stress on the port and can cause pin bending or internal fractures.
Accidental Yanks: A sudden pull on the HDMI cable—whether by pets, kids, or clumsy hands—can dislodge or distort the port.
Pushing the Console Against a Wall: Tight spaces can press against the HDMI cable, applying steady pressure that loosens the connection over time.
Rough Cable Removal: Jerking the cable out instead of gently unplugging it can weaken the port’s grip and cause wear.
So, if your screen’s gone dark and you’ve been shifting your setup often, it’s no surprise you’re now looking into how to fix Xbox Series X HDMI port issues. The damage might already be done—but the good news is, it’s fixable.
Before diving into repairs, safety first! Always:
Unplug the Xbox from power completely.
Ground yourself to avoid static discharge.
Work in a clean, well-lit area with a soft mat or surface.
Have tools ready before disassembling.
This isn’t a job for kitchen tables and butter knives. HDMI port replacement requires care, patience, and the right tools. That’s how you avoid bigger problems and do it right the first time.
Getting to the HDMI port isn’t just a quick pop-open job—it’s a careful process that demands patience and precision. Disassembling the Xbox Series X is like performing a mini surgery. One wrong move can damage fragile internal parts, so every step counts.
Here’s how the process typically goes:
Remove the Bottom Stand: This is the first layer of access, often secured with hidden clips or screws.
Unscrew and Slide Off the Outer Shell: Gently remove the casing while keeping track of all screws—each one matters.
Access the Motherboard: Inside, the HDMI port is attached directly to the motherboard, surrounded by heat sinks and other sensitive components.
Taking your time here is crucial. This step is an essential part of fixing Xbox Series X HDMI port issues—because if the disassembly is rushed, you risk making the situation worse instead of better.
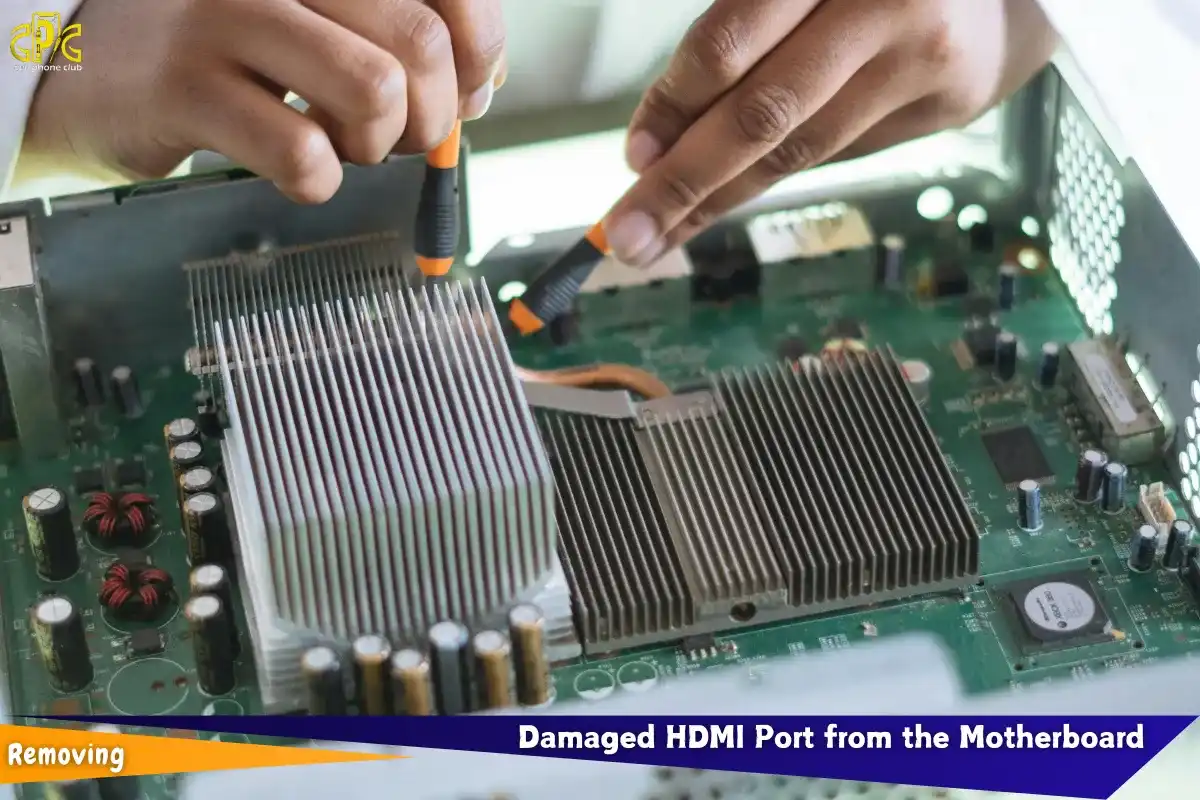
Once you’ve opened up your console and pinpointed the damaged HDMI port, it’s time for the delicate task of removal. This step requires patience and precision, as rushing it could cause further damage. Here’s how you’ll typically go about it:
Heat the Solder Joints: Use a hot air station to gently heat the solder joints that hold the port in place. This softens the solder, making it easier to lift the port without damaging surrounding components.
Lift the Port: Using tweezers or a rework tool, carefully lift the damaged HDMI port off the motherboard. Be gentle—this isn’t a job for force.
Clean Up the Solder: After removing the port, use solder wick or flux to clean any leftover solder from the motherboard, leaving the pads smooth and ready for the new port.
Before you proceed, always double-check that the motherboard pads haven’t been damaged. If they’re intact, your new HDMI port should seat perfectly. Taking your time with this process is critical—it’s like extracting a bad tooth without numbing first—rushing could cause bigger problems down the line.
Here comes the part that takes skill: installing the new HDMI port. You need:
Now comes the tricky part—installing the new HDMI port. This step requires a steady hand and the right tools to make sure the new port fits perfectly and works like a charm.
Here’s what you’ll need:
Precision Soldering Tools: A fine-tip soldering iron is essential for working with small components.
High-Quality Solder and Flux: The right solder and flux help ensure strong, clean connections.
Magnifier for Pin Alignment: A magnifying tool helps ensure every pin is aligned correctly for optimal contact.
The process is meticulous: we carefully position the new port, apply heat, and reflow the solder to ensure all pins are firmly in place. After that, we double-check all the connections with a multimeter to ensure everything is electrically sound. This is the heart of the Xbox Series X HDMI port replacement—a secure solder leads to a reliable signal and a fully functional display.
Once the new HDMI port is securely in place, it’s time to put everything back together. Reassembly is as important as the repair itself, and a careful approach ensures everything works as it should.
Here’s the process:
Reattach the Heatsink and Cooling Fan: These components need to be properly aligned and secured to avoid overheating.
Reinstall the Case and Screws: Make sure everything is back in place and all screws are tightened to prevent any rattling or loose parts.
Plug in All Necessary Cables: Double-check that every cable is reconnected properly, especially the power and HDMI cables.
Before you power it on, take one last visual inspection. Look for any loose screws or misplaced wires that could cause issues later. If everything looks solid, it’s time for the moment of truth—turn it on and check the display. With the Xbox Series X HDMI port replacement complete, you should be good to go!
Testing is crucial to ensure your hard work paid off. Once the new HDMI port is installed, we reconnect the HDMI cable to the TV and power up the Xbox. If the repair was successful, you’ll immediately see the familiar green Xbox logo splash screen. That’s the moment you know the Xbox Series X HDMI port is back in action.
However, if the screen remains blank, it’s time for a deeper check. Here’s what we do next:
Double-Check the Solder Joints: Look for any weak connections or potential shorts that might prevent a proper signal.
Test the Cable Stability: Gently move the cable to make sure the port is firmly secured and no loose connections are causing issues.
Run the Console for 30+ Minutes: Let the console run a game or video for at least 30 minutes to ensure there’s no flickering or signal drop.
Only after these tests can we confidently say that the repair was successful and your Xbox Series X is ready for action again.

Prices can vary depending on where you go, but most shops charge between $80 to $150 USD for a professional HDMI port replacement. DIY might save money, but the risk of motherboard damage is high. That’s why most gamers prefer pros to handle it. Whether you’re doing it yourself or bringing it in, it’s still cheaper than replacing the entire console.
The smiles we get from relieved gamers say it all. One customer even exclaimed, “It’s like giving my Xbox a second life!” After the repair, the difference is clear: no more flickering, a stable connection, and that crisp, sharp display they’ve been missing.
What’s even better is when we take the time to explain exactly how the damage occurred and how to prevent it in the future. It’s not just about fixing the issue—it’s about turning the repair into a learning experience. For many, this knowledge means fewer issues down the road and a console that lasts longer.
Now that you’ve got a fresh HDMI port, let’s make sure it stays that way. A few tips:
Always unplug the HDMI cable gently—don’t yank.
Don’t move the console while the cable is still attached.
Leave some slack in the HDMI cable to prevent pulling.
Also, consider keeping the console in a spot where it won’t be bumped. Prevention is way easier than another repair.
Want to avoid another round of “how to fix Xbox Series X HDMI port” drama? Simple:
Use an HDMI cable with strain relief or an angled connector.
Don’t force cables into the port—align them properly.
Avoid pressing the console against walls where cables bend sharply.
You might even consider a short HDMI extension that stays in the port, so the main cable plugs into that instead. It’s like giving your port body armor.
Believe it or not, there’s a right way to plug in HDMI:
Hold the connector firmly by the head (not the cable).
Align straight—don’t push at an angle.
Don’t wiggle it while inserting.
When disconnecting, pull gently and evenly. That’s how you keep those sensitive pins in good shape and avoid repeating the whole Xbox Series X HDMI port replacement process.
Not all HDMI cables are made equal. Look for:
Braided or reinforced cables
Gold-plated connectors
Built-in strain relief features
These last longer and protect your port better. You want something that won’t fray or snap easily. It’s a small investment that could save you a big repair bill down the line.
Is your Xbox, PlayStation, or Nintendo console acting up? Don’t worry—Cell Phone Club is your go-to destination for expert console repair. From HDMI port replacements to overheating fixes and power issues, our certified technicians are here to get you back in the game fast. We offer trusted, high-quality service at convenient locations in Brooklyn, NY and Glendale, AZ.
Call us now at (718) 836-8999
Text us on WhatsApp for quick support
Visit us at any of our locations:
378 86th Street, Brooklyn, NY 11209
6919 5th Ave, Brooklyn, NY 11209
5814 W Olive Ave Suite 104, Glendale, AZ 85302
Stop by today or reach out to schedule your repair—Cell Phone Club is one of the best Repair stores for phones & Game Consoles where gamers go when their consoles need real care.
So there you have it—how to fix Xbox Series X HDMI port, step by step. Whether you’re doing it yourself or heading to a repair shop, the key is diagnosis, precision, and prevention. Don’t panic if you see a black screen—it’s usually a fixable issue.
With the right tools and knowledge, your console will be back to delivering 4K gaming in no time. If you’re unsure or nervous, contact a professional. That way, your Xbox gets the care it deserves.
Check for a loose fit, bent pins, or no signal even with a working cable. If your TV doesn’t detect any input, the port might be damaged.
Yes, but it requires soldering skills and proper tools. If you’re not confident, it’s safer to let a pro handle it.
Rough cable removal, moving the console while plugged in, or wear and tear over time are common reasons.
A skilled technician can finish it in 1–2 hours. DIY may take longer depending on experience.
Nope! HDMI port issues are hardware-related, so software resets won’t solve the problem.
Fixing the HDMI port is way cheaper—usually under $150 compared to $500+ for a new console.
Yes! Use quality cables, avoid forceful unplugging, and handle the console gently.
Only if it’s within the warranty and the damage isn’t due to misuse. Physical damage usually isn’t covered.
Go for braided HDMI 2.1 cables with strain relief and gold-plated tips.
No. Xbox Series X relies entirely on HDMI for both audio and video output.